


-
International Relations - HUFLITInternational Relations is one of the programs designed according to domestic accreditation standards and closely follows practicality, ensuring to provide students with the necessary knowledge and skills to work in an international environment.
-
HUFLIT accepts applications for admission based on the high school transcript evaluation in the fourth roundFrom August 1st to August 22nd, 2023, Ho Chi Minh City University of Foreign Languages and Information Technology (HUFLIT) will accept applications for admission based on the results of the high school graduation exam in the fourth round of 2023 for 18 undergraduate majors under the regular system.
-
HUFLIT announces the guaranteed threshold for admission quality based on the method of evaluating the high school graduation exam results in 2023On July 24, 2023, the Admission Council of HUFLIT announced the guaranteed threshold for admission quality based on the method of evaluating the high school graduation exam results in 2023. This threshold is applicable to 18 undergraduate majors under the regular system, following the admission evaluation process regulated by the Ministry of Education and Training. The admission score threshold ranges from 15 to 16 points.
Instructions for candidates to apply for university admission on the portal of the Ministry of Education and Training in 2023
NGÀY: 17/07/2023
Chia Sẻ Qua
From 8:00 AM on July 10th to before 5:00 PM on July 30th, candidates have 3 weeks to register, adjust and supplement their preferences without any limitation on the number of times. They can do so through the online system provided by the Ministry of Education and Training (MET). For independent candidates, they can contact the Department of Education and Training (DET) where they graduated from high school or call the HUFLIT Admission Office at the hotline number 1900 2800 for specific instructions.
Below is the 4-step process guide for registering university preferences for admission through the online portal:
Step 1: Access the website http://thisinh.thitotnghiepthpt.edu.vn/ and enter the required information, including ID card/passport number, password, verification code, then click “LOG IN” to access the system.
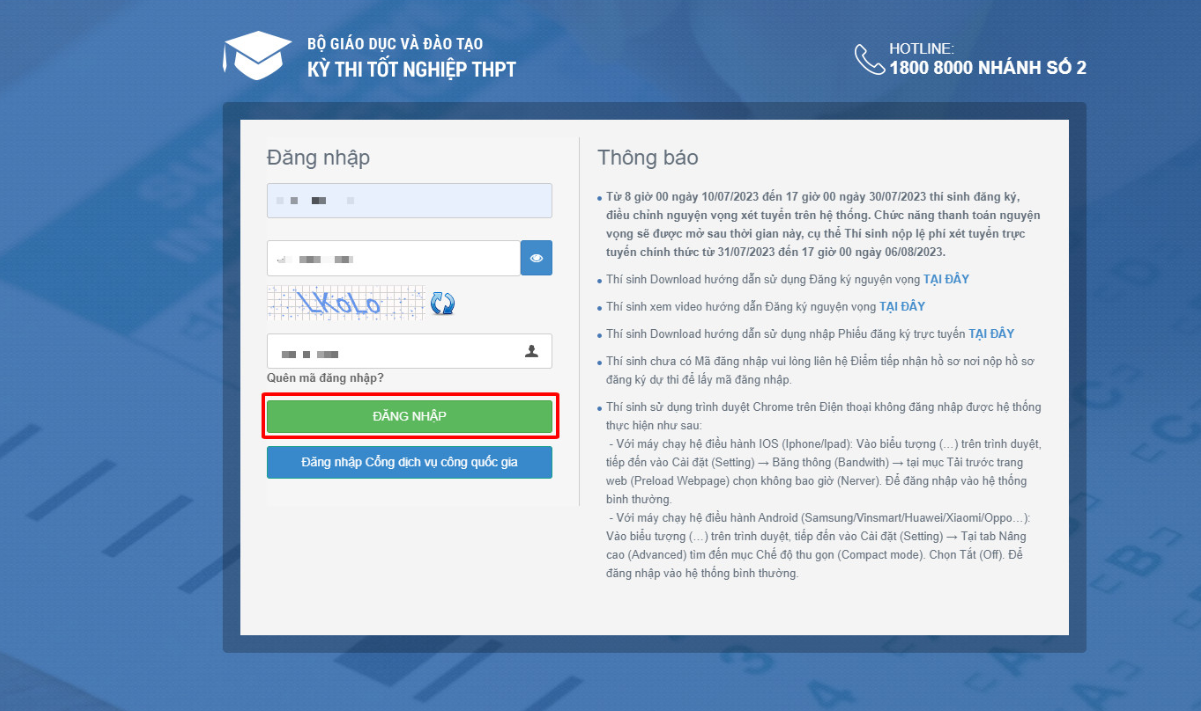
Double-check your personal information to ensure its accuracy.
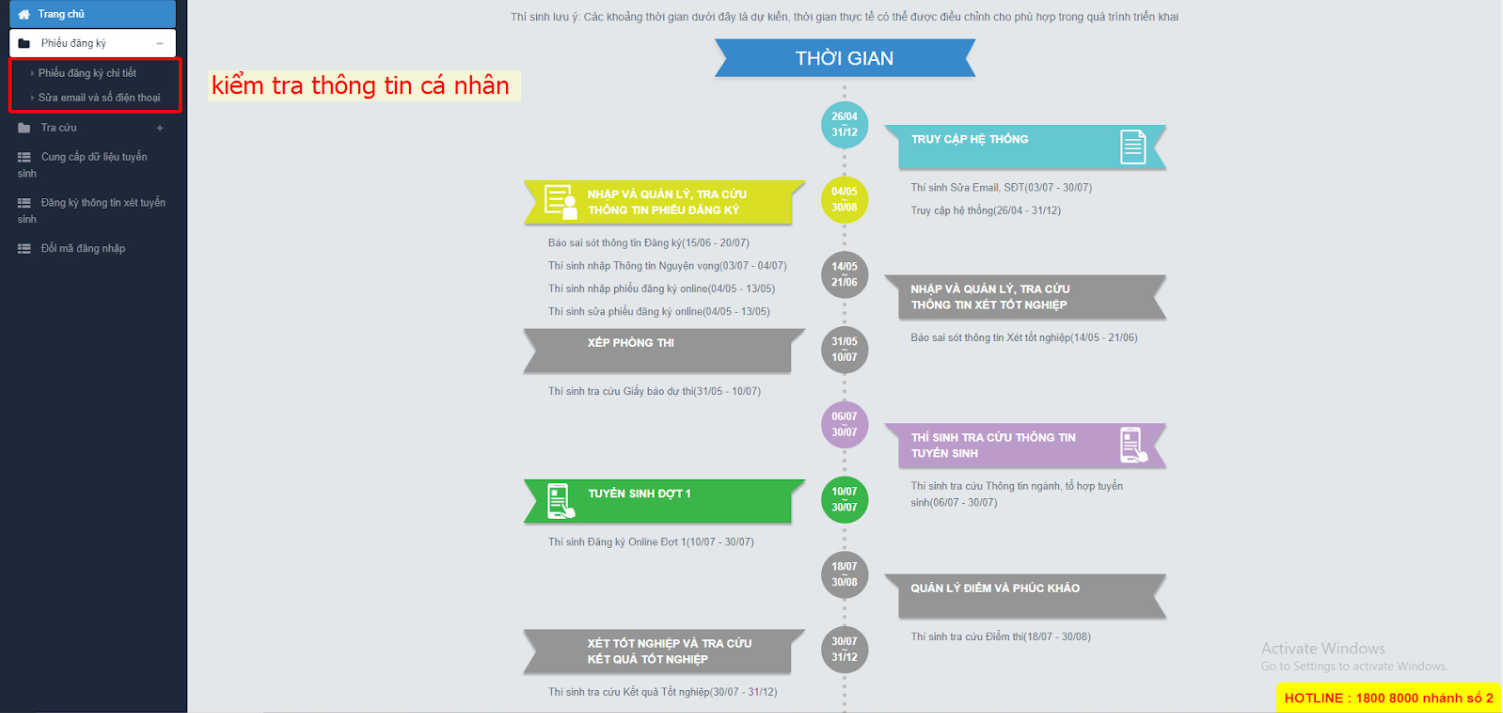
Step 2: Access the “Register for admission information” function located at the top-left corner of the screen to begin the registration process.
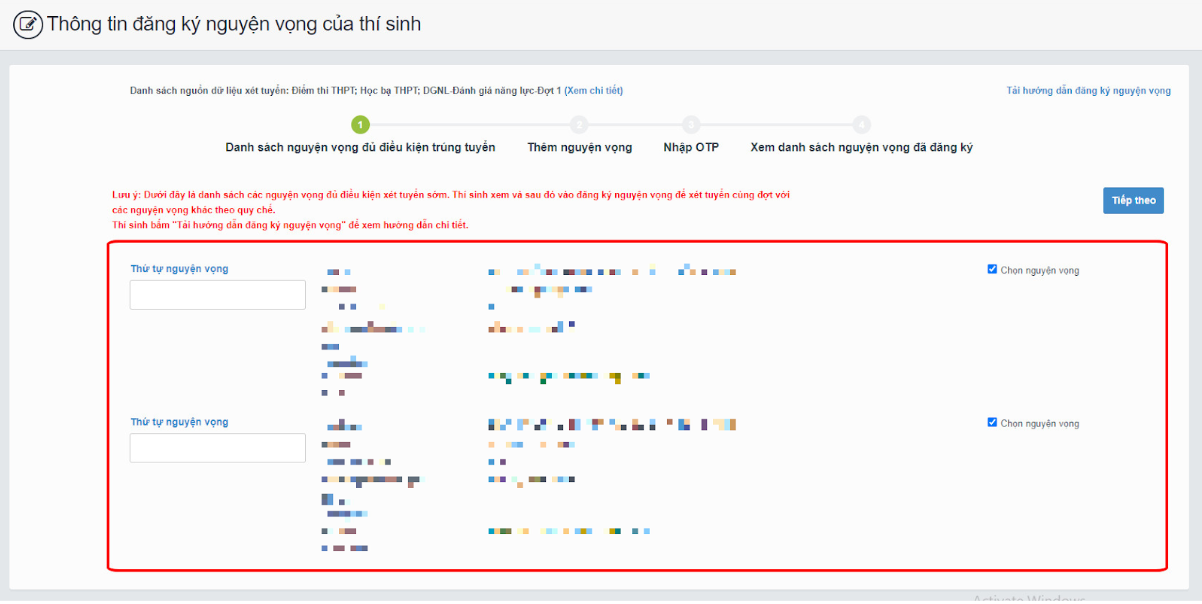
On the “University preferences registration information” screen, start filling in the necessary details in sections 1 to 4, following the instructions below:
– Section 1 “List of eligible university preferences for admission”: Choose your desired university preferences that meet the admission requirements (if any), then click “Next”.
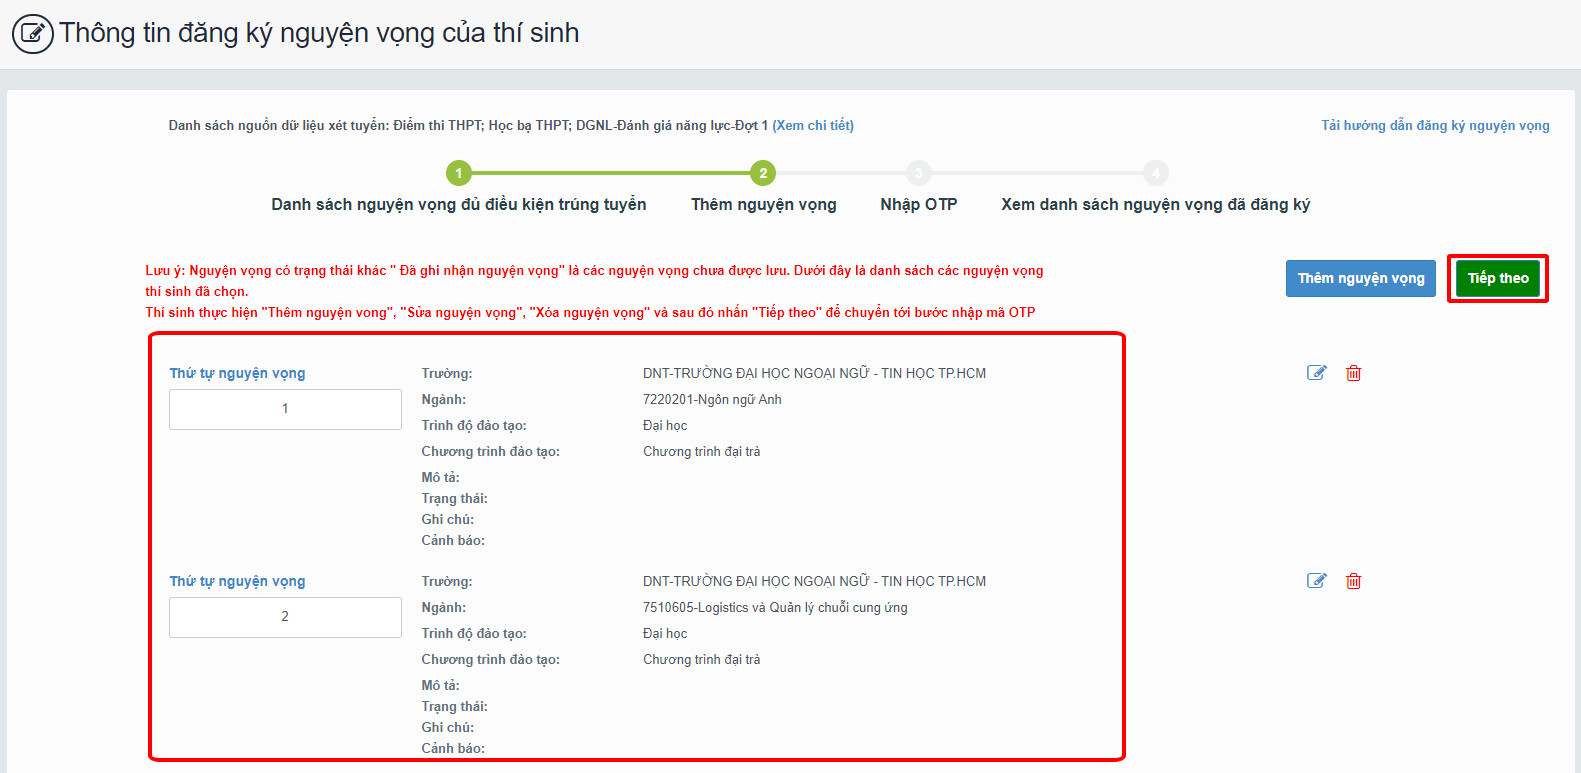
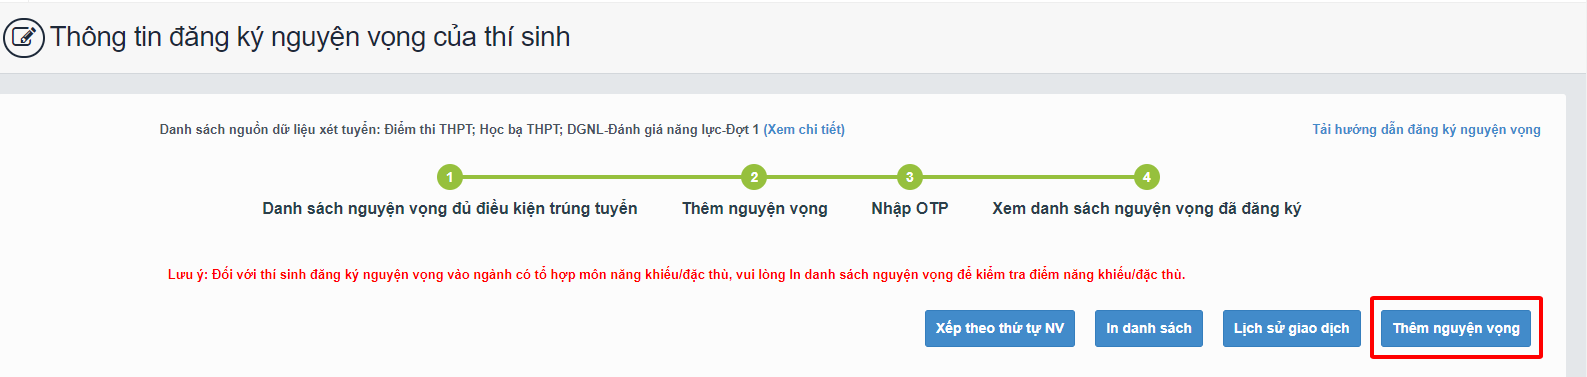
– Section 2 “Add university preferences”: Review the university preferences previously added in section 1 or add new preferences if desired. Ensure to enter the correct school name and code, as well as the major code. After adding all the preferences, click “Next” on the screen to proceed to Section 3.
– Section 3 “Enter OTP”: Compose a text message to obtain the OTP code following the instructions provided. After receiving the OTP code, enter it into the “Enter verification code” field and select “Confirm registration”.
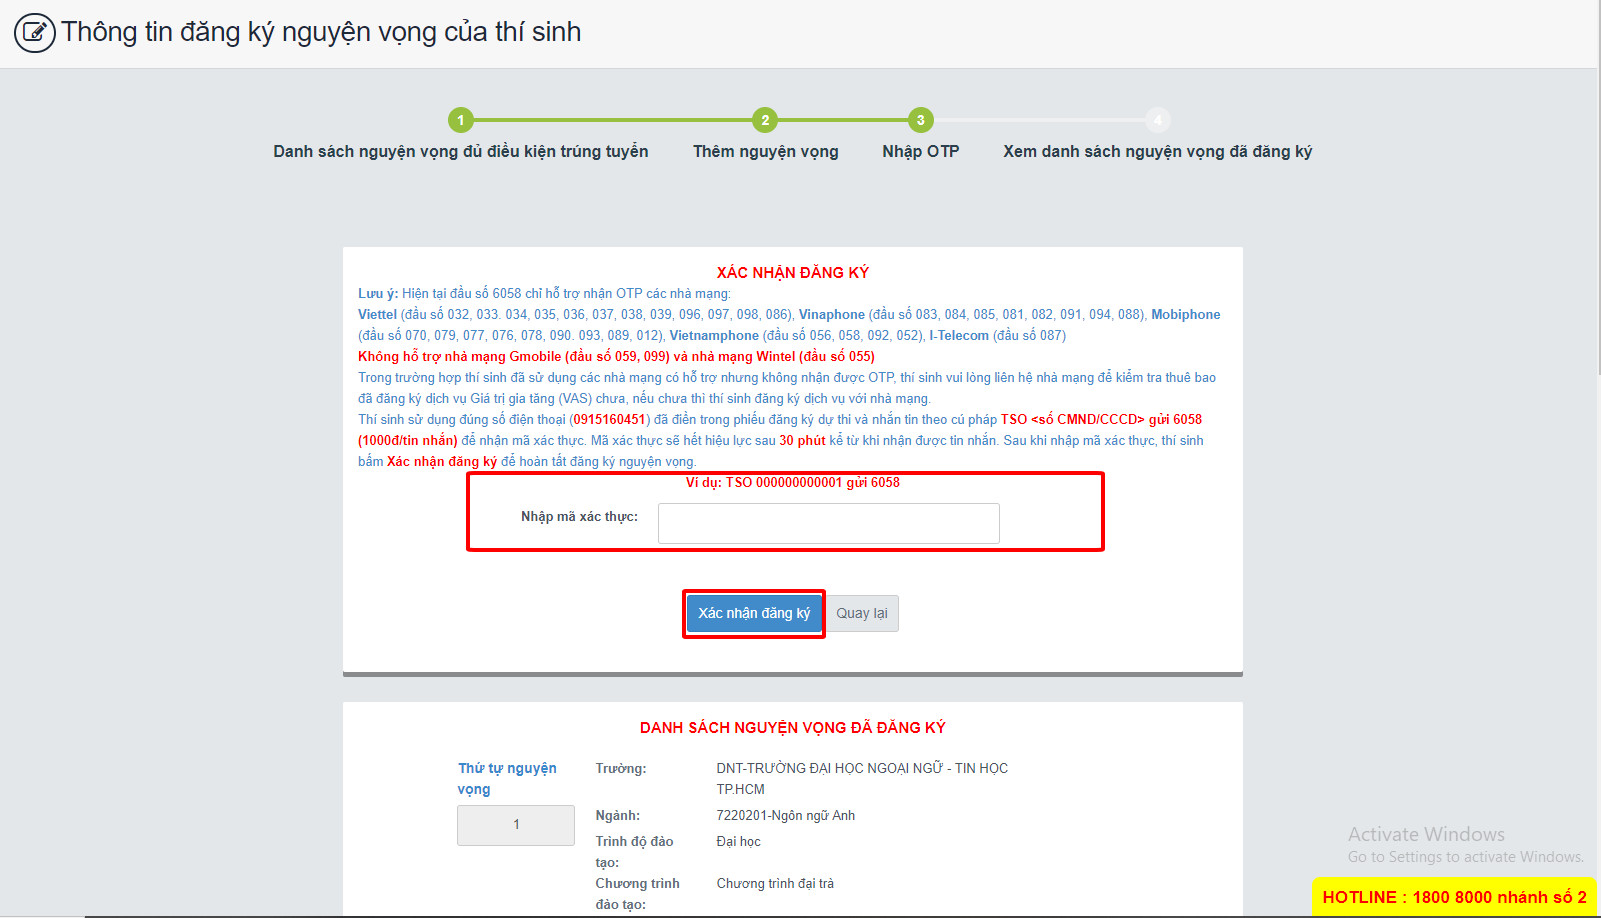
The system will then prompt you to confirm the registration by sending a text message using the TSO format to 6058. The OTP verification code will be sent to your phone number. Enter the OTP code into the “Enter verification code” field and click “Confirm registration” to complete the registration process.
– Section 4 “View registered university preferences”: You can review all the university preferences you have registered, and the system will record them accordingly.
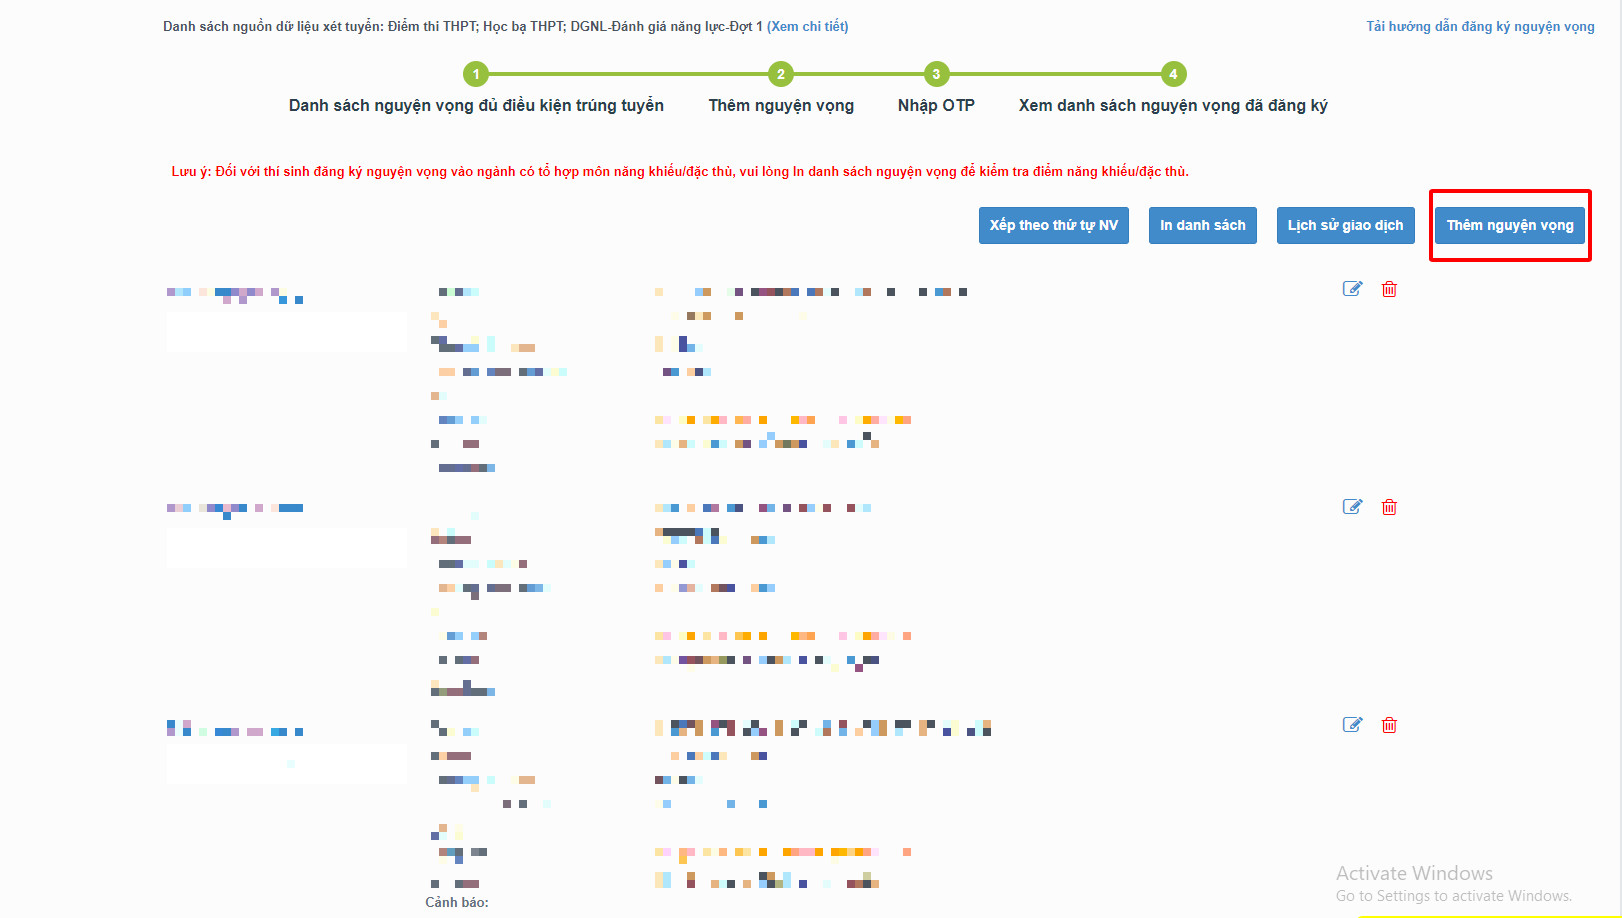
To edit a preference in the list of university preferences, click the “pencil icon” next to the preference.
Step 3: Changing preferences
Candidates can perform one of the following actions: Rearrange the order of preferences or Delete, Edit, Add new preferences as many times as desired from July 10th to July 30th, 2023.
3.1. Changing the order of preferences: To modify the order of preferences, candidates select “Arrange by preference order” and enter the desired order into the corresponding preference order boxes.
– After clicking the “Arrange by preference order” button, the system will rearrange the preferences in ascending order.
3.2. Deleting a preference: To delete a preference, candidates simply click the “Red trash can” icon next to that preference.
– A confirmation window will appear on the screen, and candidates click “Agree” to confirm the deletion and remove that preference from the list of registered university preferences.
Note: After deleting a preference, candidates need to click “Next” and enter the OTP code to save the changes made. Candidates must complete all steps and review the registered preferences in Section 4 “View registered university preferences” (Step 2) to carefully check the registration information.
Step 4: Payment
After July 31st, candidates can proceed to make the payment for their university preferences.
CONTACT INFO
Apply for admission at
tuyensinh.huflit.edu.vn
Find out information
huflit.edu.vn
Advising education enrollment
